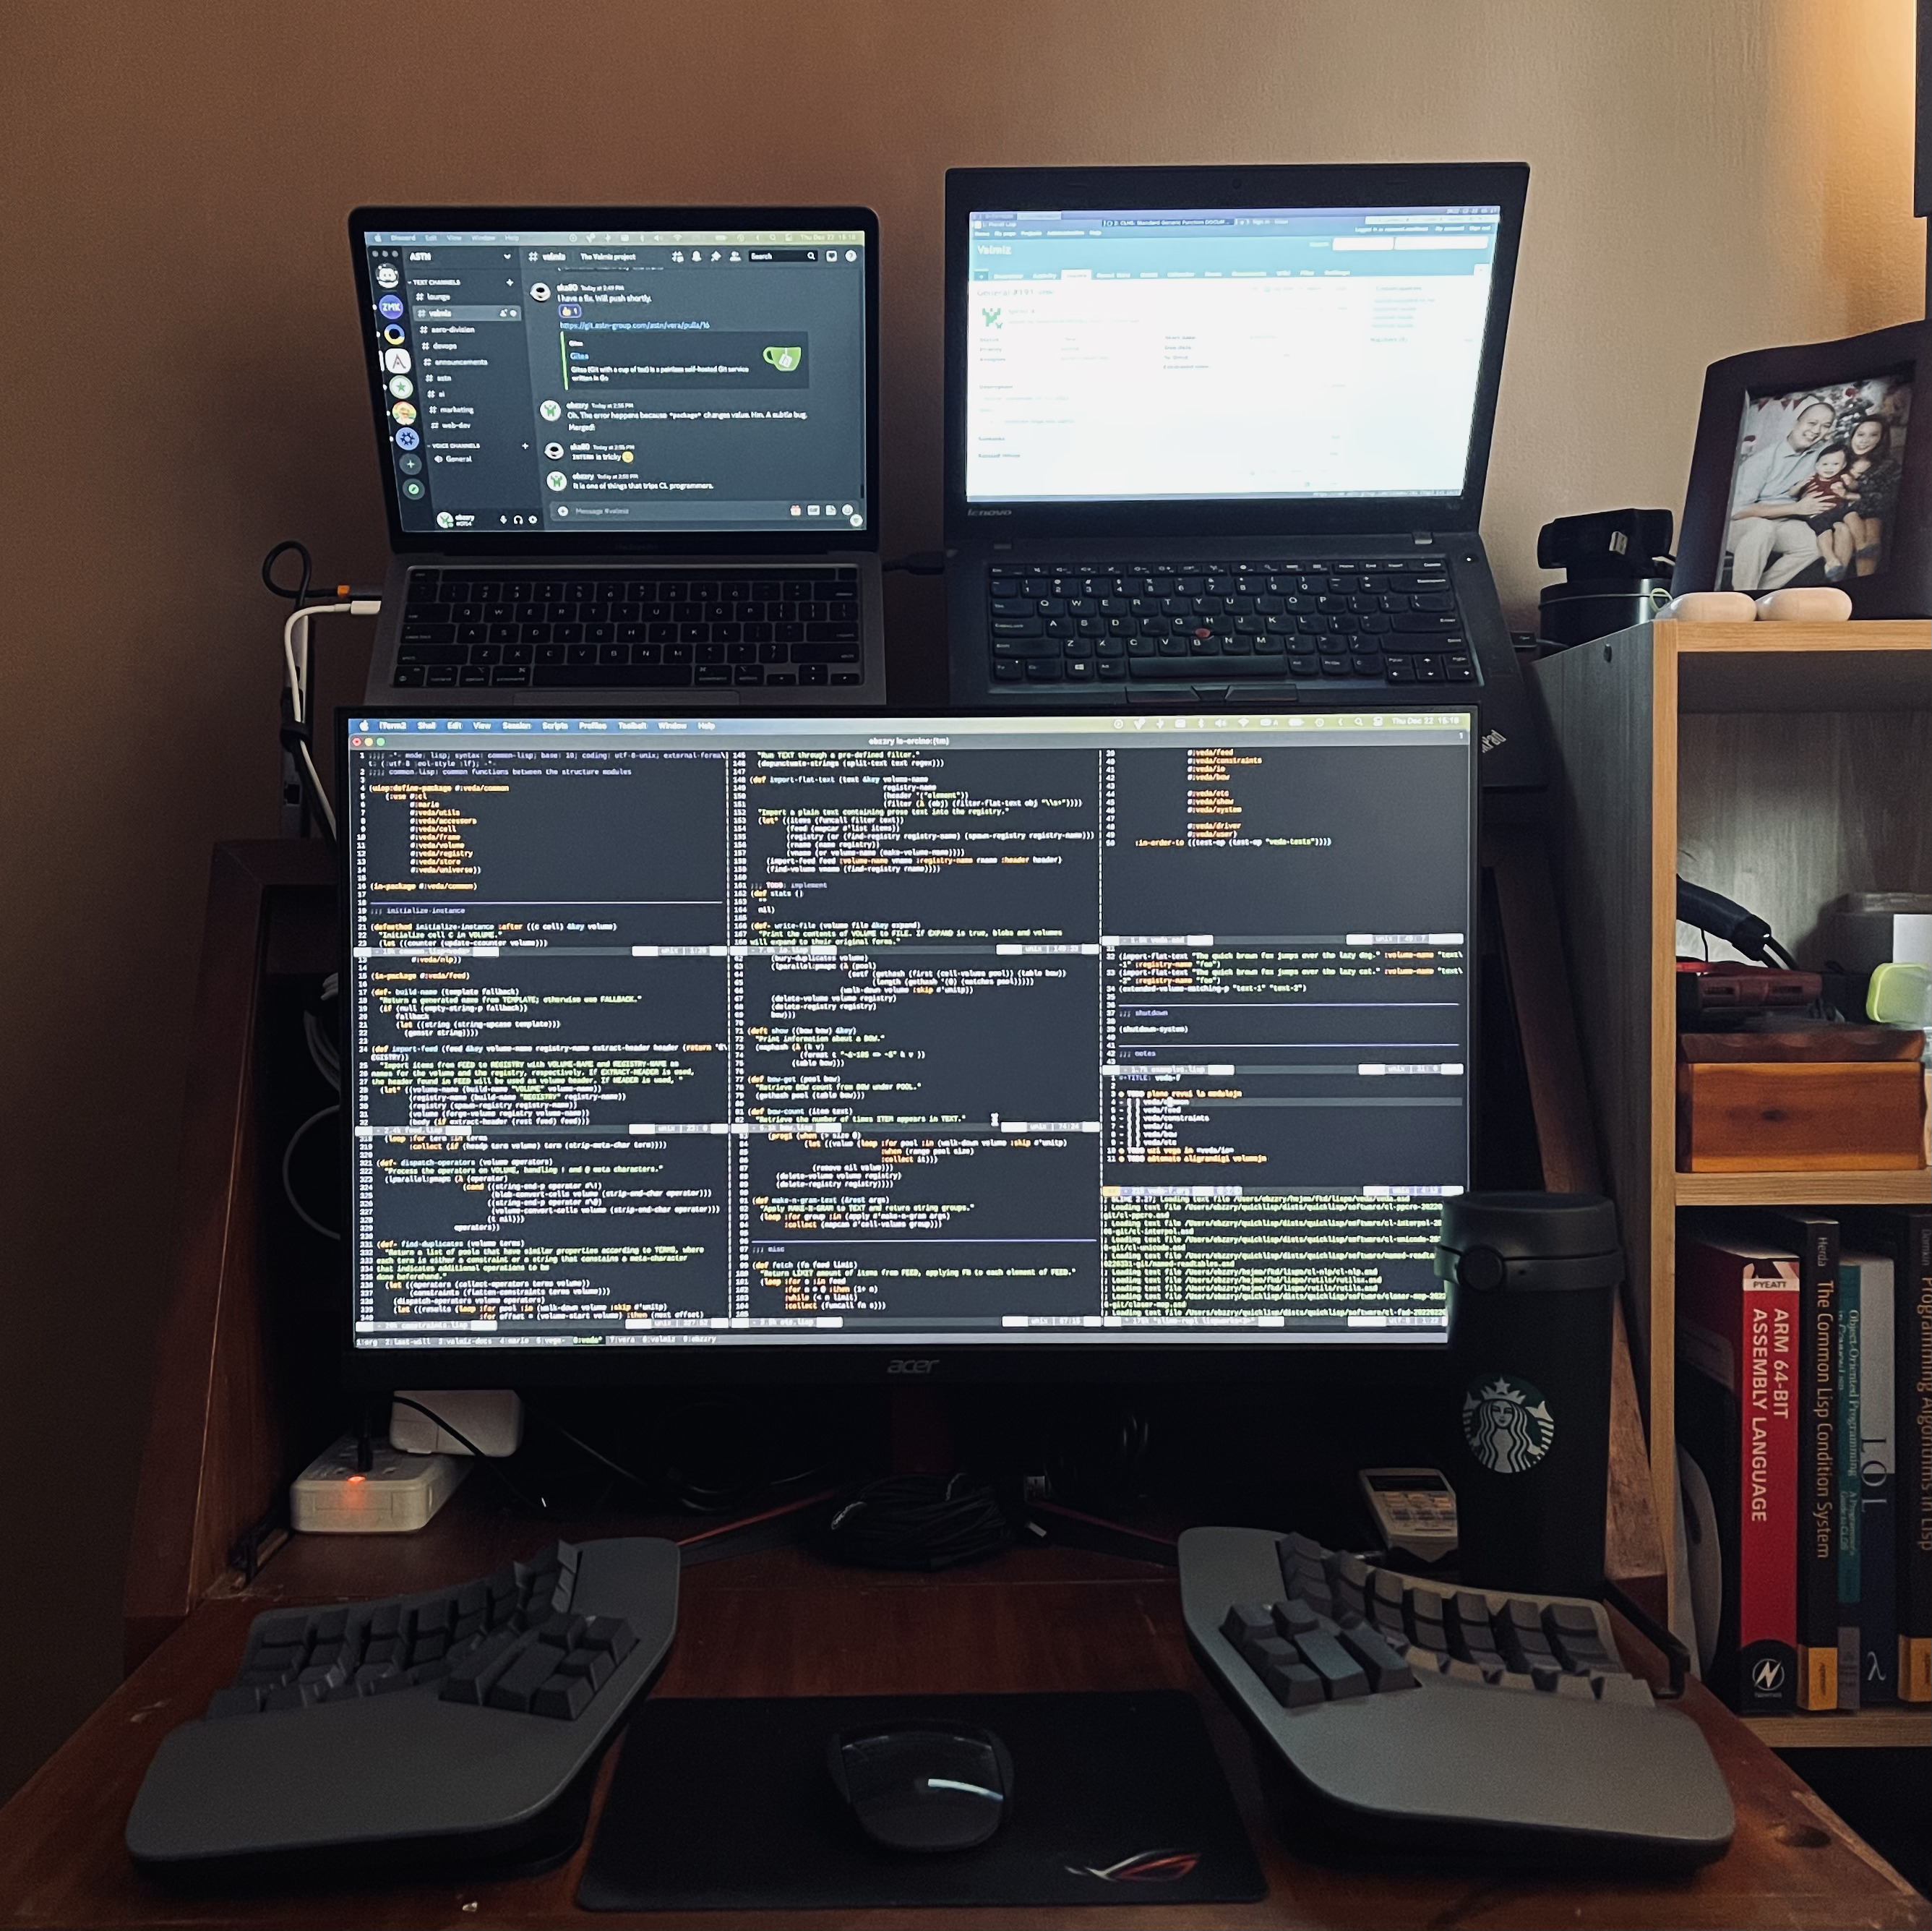
How I Use the Kinesis Advantage360 Professional
It’s the idle hours that often lead a man to ruin.
—The Killer, The Killer (2023)

Table of contents
Introduction
An upgrade is either something that is an improvement over the old version, or it is something that is step back. It is rare too see a new version of a product that can happily exist with the old one. That is the case with the Kinesis Advantage and Kinesis Advantage360 Professional. I wrote previously about the Kinesis Advantage.
When I learned in 2022 that Kinesis was going to introduce a new line of Advantage keyboards with the ability to remap the keys using software, and has wireless connectivity, I became curious. I contacted my Kinesis supplier from Japan, the same company that I got my Advantage from. I got a reply within 24 hours and he said that they indeed have the keyboard on stock. I ordered it. I was stoked.
It arrived by mail within two months. Now, that amount of time may seem long, but for a premium product like it, it was worth it.
History
When the announcement of the new keyboard model came, I did extensive research about it, learning everything that I can about it. I learned that it uses the ZMK firmware. I learned that in order to re-define the keys, you use a web tool hosted on GitHub. I learned that if you don't want that, you can still edit the files containing the definitions, push them to GitHub and let it build the firmware files for you. I learned that if you still don't want to use GitHub, you can use Docker and Colima, instead.
I learned that it has excellent Bluetooth connectivity, and that it can happily co-exist with your other Bluetooth devices without issues. I also learned that you can buy an entire set of keycaps without labels on it. Cool.
When the device came, the first thing that I did was to replace the keycaps with ones that don't have the labels on them. They just look better without them. I then went ahead and paired the device to my machines. It was a fluid process.
Basics
Of course, I wasn't happy with the default layout and went on to change it. I'll describe the steps that I took to change it.
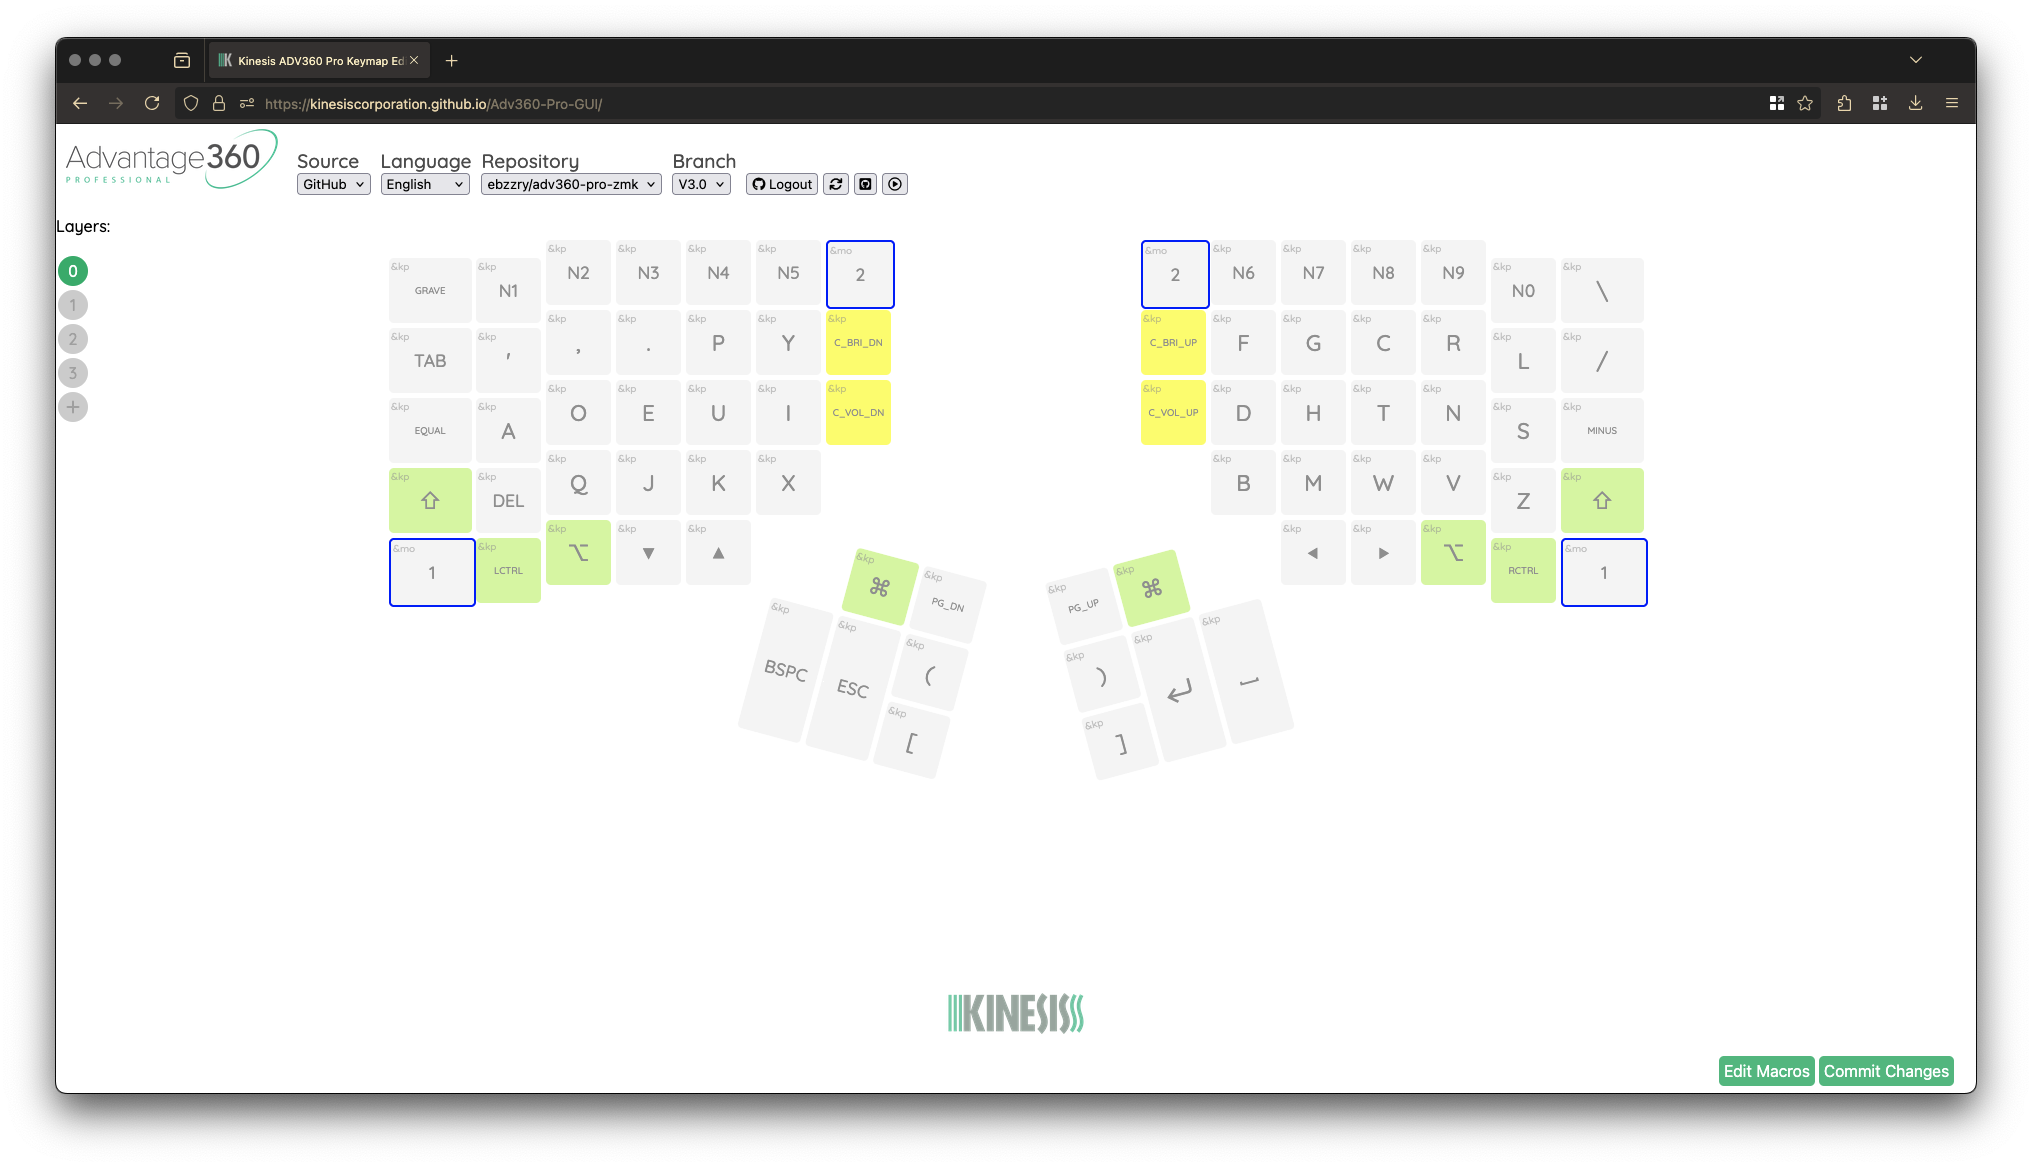
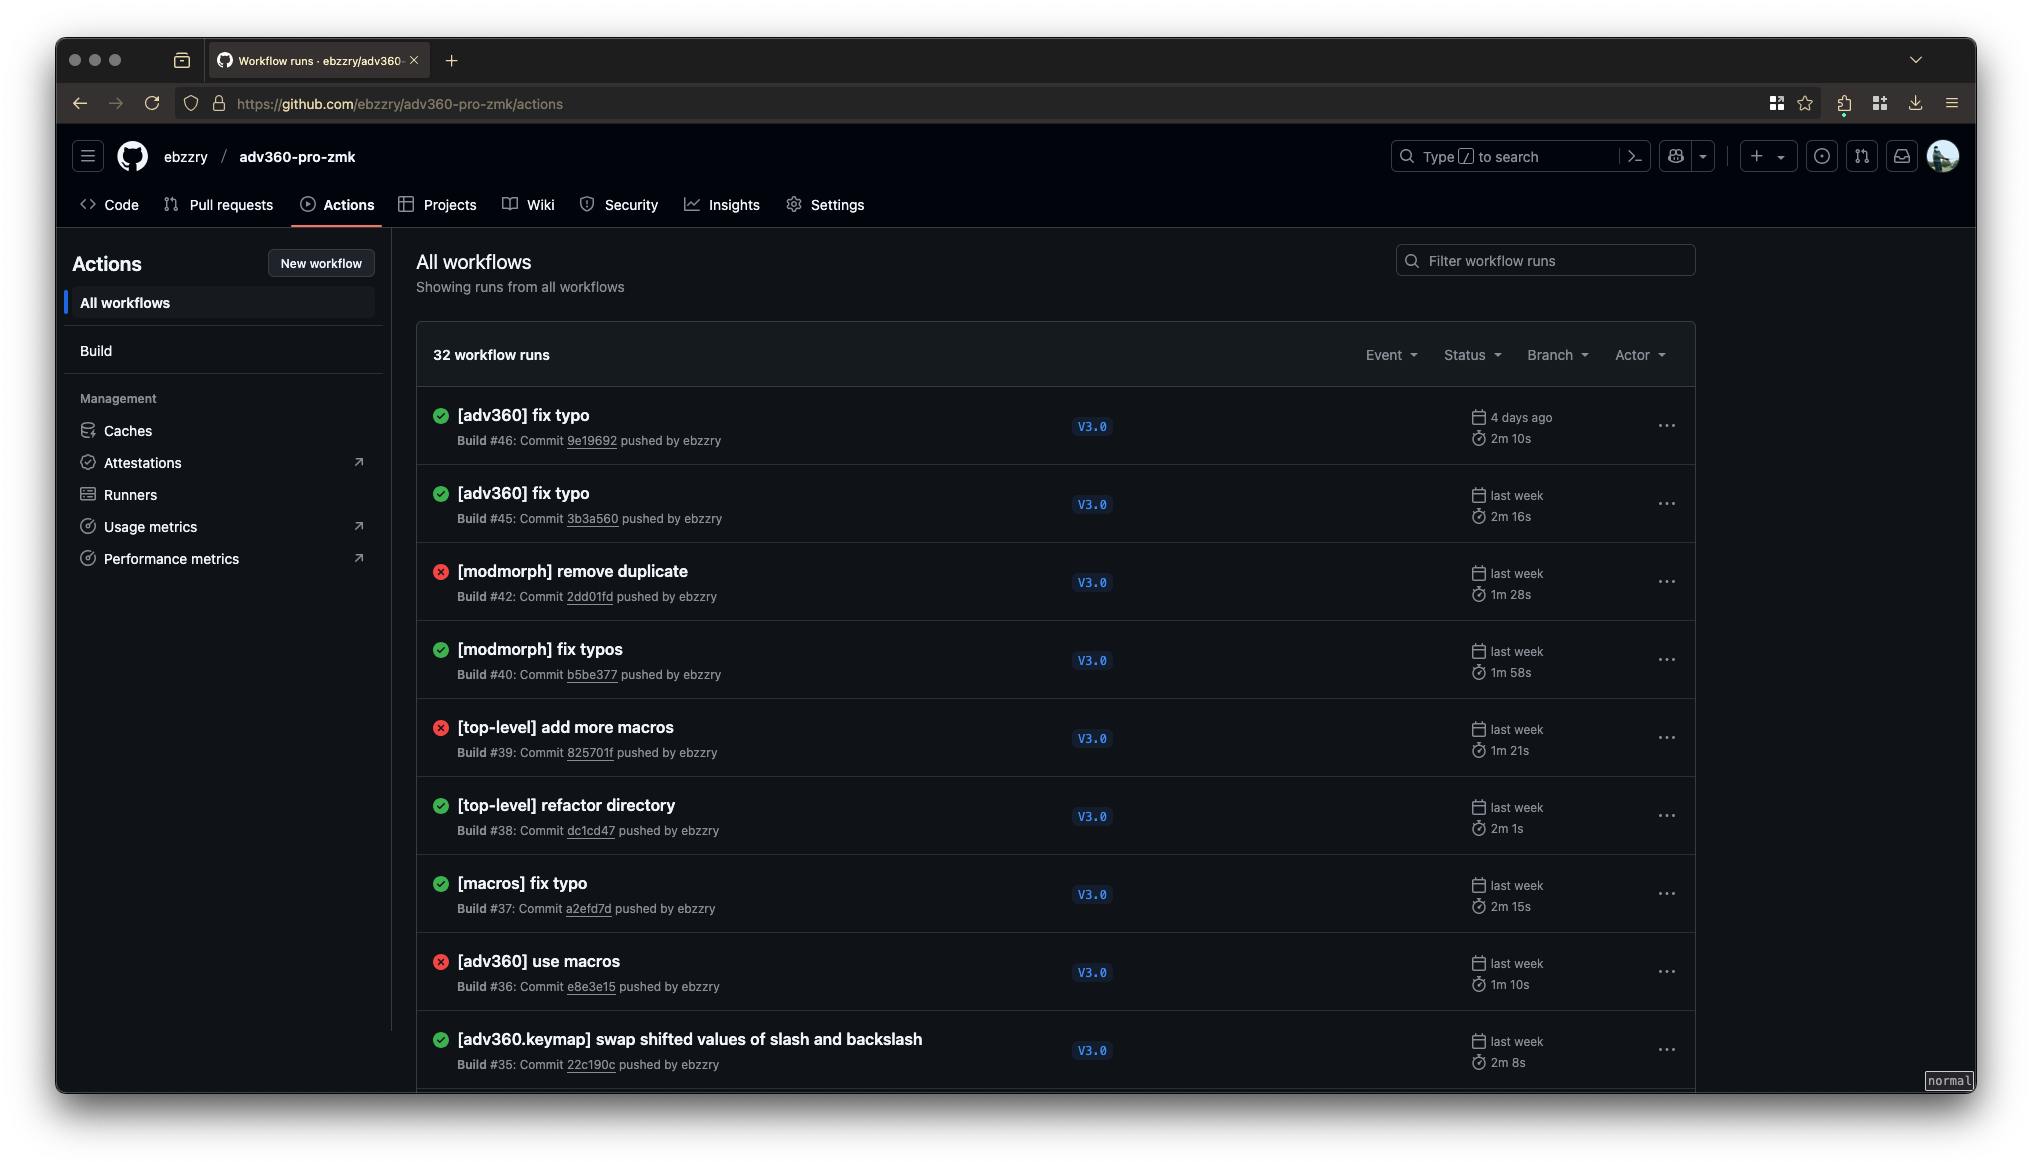
First, you to go to the Adv360-Pro-ZMK repository, then fork it. Next, enable Actions so that every time you push changes to your repository, new firmware files are going to be built.
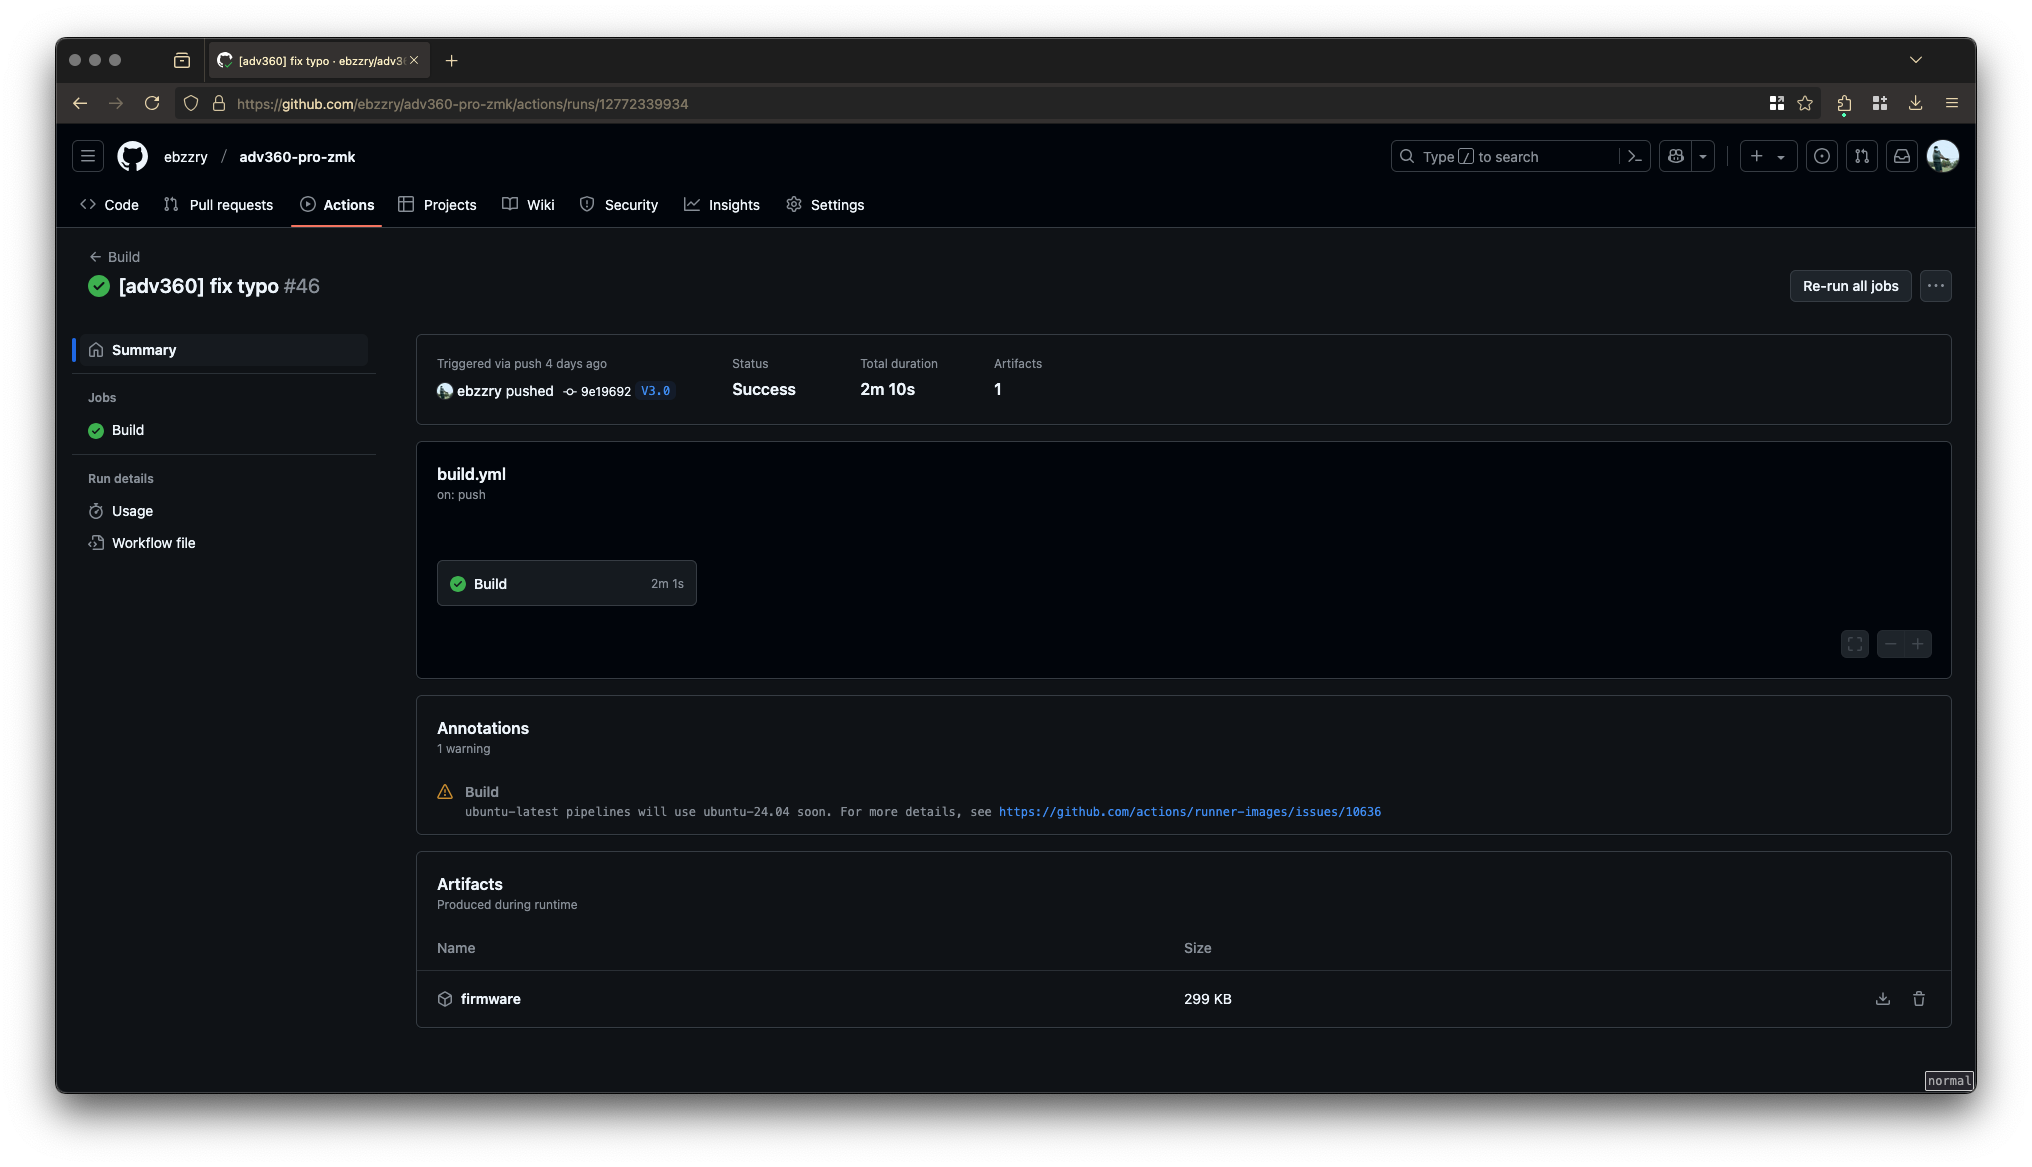
So, what I would do is to make changes in the web app, save the changes, then wait for the firmware files to be built. The firmware files will be accessible from the Actions tab, click the appropriate job, then follow the firmware link.
The resulting files will be 202501180513-70c6055-left.uf2 and 202501180513-70c6055-right.uf2 for the left and right sides, respectively. The filenames will be different, of course, when you do it. I rename them to left.uf2 and right.uf2, respectively, for convenience.
Connect one keyboard at at the time to you machine using the cable provided. To flash it, you enter the bootloader mode, by either pressing Mod2+Bootloader or by double-tapping a small knob between the Del, Home, and End keys. A paperclip should do it.

A new volume will be mounted under /Volumes/ADV360PRO/, on macOS.
The keyboard would light green, indicating that it is ready for flashing. To transfer the files to the keyboard, you run the following command:
rsync -avP left.uf2 /Volumes/ADV360PRO
The keyboard will display some dancing flash lights, then it will stop. Do the same procedure for the other half, but this time with right.uf2
rsync -avP right.uf2 /Volumes/ADV360PRO
To bring them back up, turn the devices back on, and wait for them to synchronize with each other. When you see a steady white light on the device, you should be ready to go.
Configuration
After months of using the web app, I discovered that my workflow would be much better if I directly edited the map files. The web app, while it works for a lot of users, felt clunky to me.
I went on an adventure and actually learned more about the ZMK system works. I discovered, that it's actually straightforward. The official ZMK documentation is very helpful, here.
My attention went first to config/adv360.keymap, which looked like a C source file:
/*
 * Copyright (c) 2020 The ZMK Contributors
 *
 * SPDX-License-Identifier: MIT
 */


/* THIS FILE WAS GENERATED!
 *
 * This file was generated automatically. You may or may not want to
 * edit it directly.
 */

#include <behaviors.dtsi>
#include <dt-bindings/zmk/keys.h>
#include <dt-bindings/zmk/bt.h>
#include <dt-bindings/zmk/rgb.h>
#include <dt-bindings/zmk/backlight.h>

...
What's nice are these things:
behaviors {
  #include "macros.dtsi"
  #include "version.dtsi"
  #include "modmorph.dtsi"
};
which allowed me to decompose the configuration into different components. .dtsi is short for Devicetree Source Include, which is a type of an include file for Devicetree configuration.
Mod-morphs
The mod-morph behavior allows you to define a key and another behavior, depending on what mods you specify. I wanted to have the pair 9 and <, so that pressing Shift+9 would yield a <. The same with 0 and >.
To do so, I put the following in modmorph.dtsi
n9_less: n9_less {
  compatible = "zmk,behavior-mod-morph";
  #binding-cells = <0>;
  bindings = <&kp N9>, <&kp LESS_THAN>;
  mods = <(MOD_LSFT|MOD_RSFT)>;
};

n0_greater: n0_greater {
  compatible = "zmk,behavior-mod-morph";
  #binding-cells = <0>;
  bindings = <&kp N0>, <&kp GREATER_THAN>;
  mods = <(MOD_LSFT|MOD_RSFT)>;
};
You can find the other mod-morphs that I use in modmorph.dtsi.
Macros
Another interesting feature is macros. It allows you to define key presses or combinations, for your convenience. I wanted to make pressing Mod1+` input six graves, then put the cursor in the middle. I use this whenever I need to type Markdown code blocks.
To do so, I put the following macros.dtsi:
m_graves: m_graves {
    compatible = "zmk,behavior-macro";
    label = "m_graves";
    #binding-cells = <0>;
    bindings = <&kp GRAVE>, <&kp GRAVE>, <&kp GRAVE>, <&kp GRAVE>, <&kp GRAVE>, <&kp GRAVE>, <&kp LEFT>, <&kp LEFT>, <&kp LEFT>;
};
You can find the other macros that I use in macros.dtsi.
Dvorak
At first, I used the QWERTY layout for the main keys, modifying only the other keys. Since I use Dvorak, I would change the keyboard layout of my desktop enviroment using whatever the operating system provided. It meant that my keystrokes are translated from QWERTY to Dvorak, to the operating system.
That seemed fine, at first, but the problem came when I had to use the keyboard for my other devices. I had to make sure that all of the devices that I used the keyboard with had to have a translation layer.
I thought, why not just have the keyboard input Dvorak keys, instead. So, that's what I did. I changed the definitions of all the keys so that they would emit Dvorak keys. I should have done that a long time ago.
For the main layer, the adv360.keymap file on the left half of the keyboard is
&kp GRAVE       &kp N1       &kp N2       &kp N3       &kp N4       &kp N5
  &kp TAB      &kp SQT  &comma_semi   &dot_colon        &kp P        &kp Y
&kp EQUAL        &kp A        &kp O        &kp E        &kp U        &kp I
&kp LSHFT     &del_ins        &kp Q        &kp J        &kp K        &kp X
    &mo 1    &kp LCTRL     &kp LALT     &kp DOWN       &kp UP
the right side is
&kp N6      &kp N7        &kp N8       &n9_less    &n0_greater &kp BACKSLASH
&kp F       &kp G         &kp C        &kp R       &kp L       &kp SLASH
&kp D       &kp H         &kp T        &kp N       &kp S       &kp MINUS
&kp B       &kp M         &kp W        &kp V       &kp Z       &kp RSHFT
            &kp LEFT      &kp RIGHT    &kp RALT    &kp RCTRL   &mo 1
and the middle part is
       &mo 2                                                 &mo 2
&kp C_BRI_DN                                                 &kp C_BRI_UP
&kp C_VOL_DN    &kp LWIN  &kp PGDN    &kp PGUP  &kp RWIN     &kp C_VOL_UP
                          &kp LPAR    &kp RPAR
    &kp BSPC    &kp ESC   &kp LBKT    &kp RBKT  &kp ENTER    &kp SPACE
Local builds
While the GitHub method is nice and convenient, it doesn't come without caveats. One is that I have to be online in order to use it. Another is that it moves my attention away from my editor and terminal, and that's not good because it breaks my flow of thinking.
To build local images, install Docker and Colima, start them, then build the firmware files from the repository directory
brew install docker colima
colima start --arch aarch64
cd adv360-pro-zmk
make
Of course the initial build time is going to be long, since it has to install everything.
When building has finished and there were no errors, the firmware files will be available in the firmware/ directory.
> tree firmware
firmware
├── 202501180513-70c6055-left.uf2
└── 202501180513-70c6055-right.uf2

1 directory, 2 files
Closing remarks
The Kinesis Advantage360 Professional is an excellent investment if you use a keyboard a lot. There have been minor hiccups like having the two parts not synchronizing with each other after flashing a new firmware, but it is manageable. Overall, I would say, that the Advantage360 Professional is a top-tier input device that has secured its own spot in the rich world of (mechanical) keyboards.
It is currently available on Amazon. More information about Kinesis and their other products are available on their website and X.
Notes
I just discovered today, January 25, 2025, that there's a new interface for programming the device called Clique.
I may try it, soon.


