A Brief Git and GitHub Tour
Know how to solve every problem that has been solved.
—Richard P. Feynman

Table of contents
Introduction
This short tutorial shows to use git with a GitHub workflow. A quick web search of git workflows shows plenty of diverse results. This article describes just one of the possible ways of using git with a git-hosting service like GitHub.
In this article, the $ symbol represents the prompt. For demonstration purposes, we’ll use nano as the text editor. However, you’re free to use whatever editor you want to use.
Basics
Initial use
To make things easier later on, you’ll need to create a .gitignore file. The .gitignore file specifies files that will be excluded from the repository. Some of these are binary files, and error messages that are generated during compilation.
.gitignore files are specific to a project type. A good place to start in determining what a .gitignore file should contain is https://gitignore.io. Specify the type of project in the field, then click Generate, then copy the output to your clipboard.
Create a directory for the project, then cd into it:
$ mkdir foobar
$ cd foobar
Edit the .gitignore file in the current directory:
$ nano .gitignoreThen, paste the contents that you have copied earlier. Save the changes.
You may now initialize the Git repository:
$ git initInitially, add all the files in the current directory:
$ git add .Then, commit the changes:
$ git commit -m "Initial commit"Subsequent uses
This section describes the basic commands that you’re going to use, when you already have a repository.
Create a branch that will hold your changes:
$ git checkout -b experimentalIf you want to add a file to the repository:
$ git add Blah.javaWhen you have made changes to your files, stage them:
$ git add -uTo display the changes that you have staged:
$ git diffTo commit the changes:
$ git commit -m "Make changes"To display the commit log:
$ git logTo display the commit log with the diffs:
$ git log -pWhen you’ve tested your changes to be stable, switch to the master branch:
$ git checkout masterThen merge with experimental:
$ git merge experimentalAfter that, you may delete the experimental branch:
$ git branch -d experimentalWorking online
This section describes how to work with other developers. You’re going to use GitHub in this discussion.
Generate your SSH keys
You need to be able to authenticate yourself to your GitHub account, before you can push changes. To do that, you need to create your SSH keys. To do that, run the following command. Make sure that you supply a strong passphrase, when prompted:
$ ssh-keygen -t ed25519After you have created your keys, you need to add that key to your GitHub account. To do that, run the following command then copy the output:
$ cat ~/.ssh/id_ed25519.pubGo to https://github.com/settings/ssh, then click Add SSH key or New SSH key:

Paste the key, then follow through.
Creating a repository
In your repositories page, create a new repository by clicking New:

Follow through the prompts. When you have filled in the required fields, you’ll get a string of commands. Replace vakelo and foobar with your GitHub username, and the name of the repository that you have created, respectively:
$ git remote add origin git@github.com:vakelo/foobar.git
$ git push -u origin master
You’ll be prompted to supply the passphrase you have entered above. The git push command uploads the contents of your repository to the remote repository.
Updating your repository
When you have made further changes to the repository, you may push your changes with the command:
$ git push origin masterParticipation
If you want to contribute to a project, you’ll need to work on a copy of that repository, then push changes to your own fork.
First, fork the project. Go to the project that you want to fork, then click Fork:

This will create a copy of a repository in your own GitHub account.
Next, you need to clone that forked project, to your local disk. Copy the URL located in the SSH clone URL field:
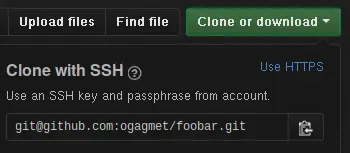
then run the following command, where memeho is your username:
$ git clone git@github.com:memeho/foobar.gitNext, create a remote that will track changes from the source repository.
$ git remote add upstream git@github.com:vakelo/foobar.gitWhen you want to make changes to the code, create a separate branch. Use a branch name that is descriptive of the changes that you want to make. This name can be changed later. In this example, we’ll create a branch named new-options:
$ git checkout -b new-optionsYou may now make changes to the files in this branch. When you’ve committed your changes, push the changes to your fork:
$ git push origin new-optionsIf you want the source repository to merge your changes, create a Pull Request by going to the source repository’s page, then click Pull requests:

On the next page, click New pull request:

Select compare across forks:
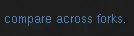
In the left side, under the base fork field, select vakelo/foobar, and in the base field, select master.
In the right side, under the head fork field, select memeho/foobar, and in the compare select new-options
Then, click Create pull request:
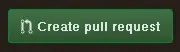
then, follow through.
Synchronizing with upstream
To synchronize the upstream branch with the local repository, pull changes from the upstream remote:
$ git pull upstream masterThen push to your own repository:
$ git push origin masterPulling changes
If you are the owner of the source repository, and you want to pull in changes from contributors, click Pull requests from the repository page:
then, follow through.
Merging with upstream
If you are a contributor, and your changes have been pulled in the source repository, synchronize your upstream branch:
$ git pull upstream masterAt this point, you may delete the new-options branch you have created earlier:
$ git branch -d new-options
$ git push origin -d new-options
Closing remarks
The workflow described in this document is only one of the many usable workflows that one can use. This document serves as an introduction for people who are new to Git and GitHub.
